Today we are celebrating two wonderful years of the creation of this blog. Thank you so much to all of you that have read and commented throughout this time. I am now moving to a new adventure and hope all of you will accompany me too. We have just launched the new website for Craft Room Secrets, I have added the link to it below and I am hoping to see you there soon!
Glenys
Craft Room Secrets website

Wednesday, December 31, 2014
Monday, December 15, 2014
My 2014 December Daily
As soon as I saw the amazing Believe collection from Heidi Swapp I knew it was the right choice to use for my December Daily for this year. I was so inspired by the colors and images that I couldn't wait to get started. In a few days I had my finished album.


The first step was to get all my supplies and create a Kit, just looking at all my goodies together made me so happy.

Buying a December Daily kit can be expensive, you can instead create your own using stickers, stamp sets, washi tape. This year I used a lot of free printables that I found on Pinterest.
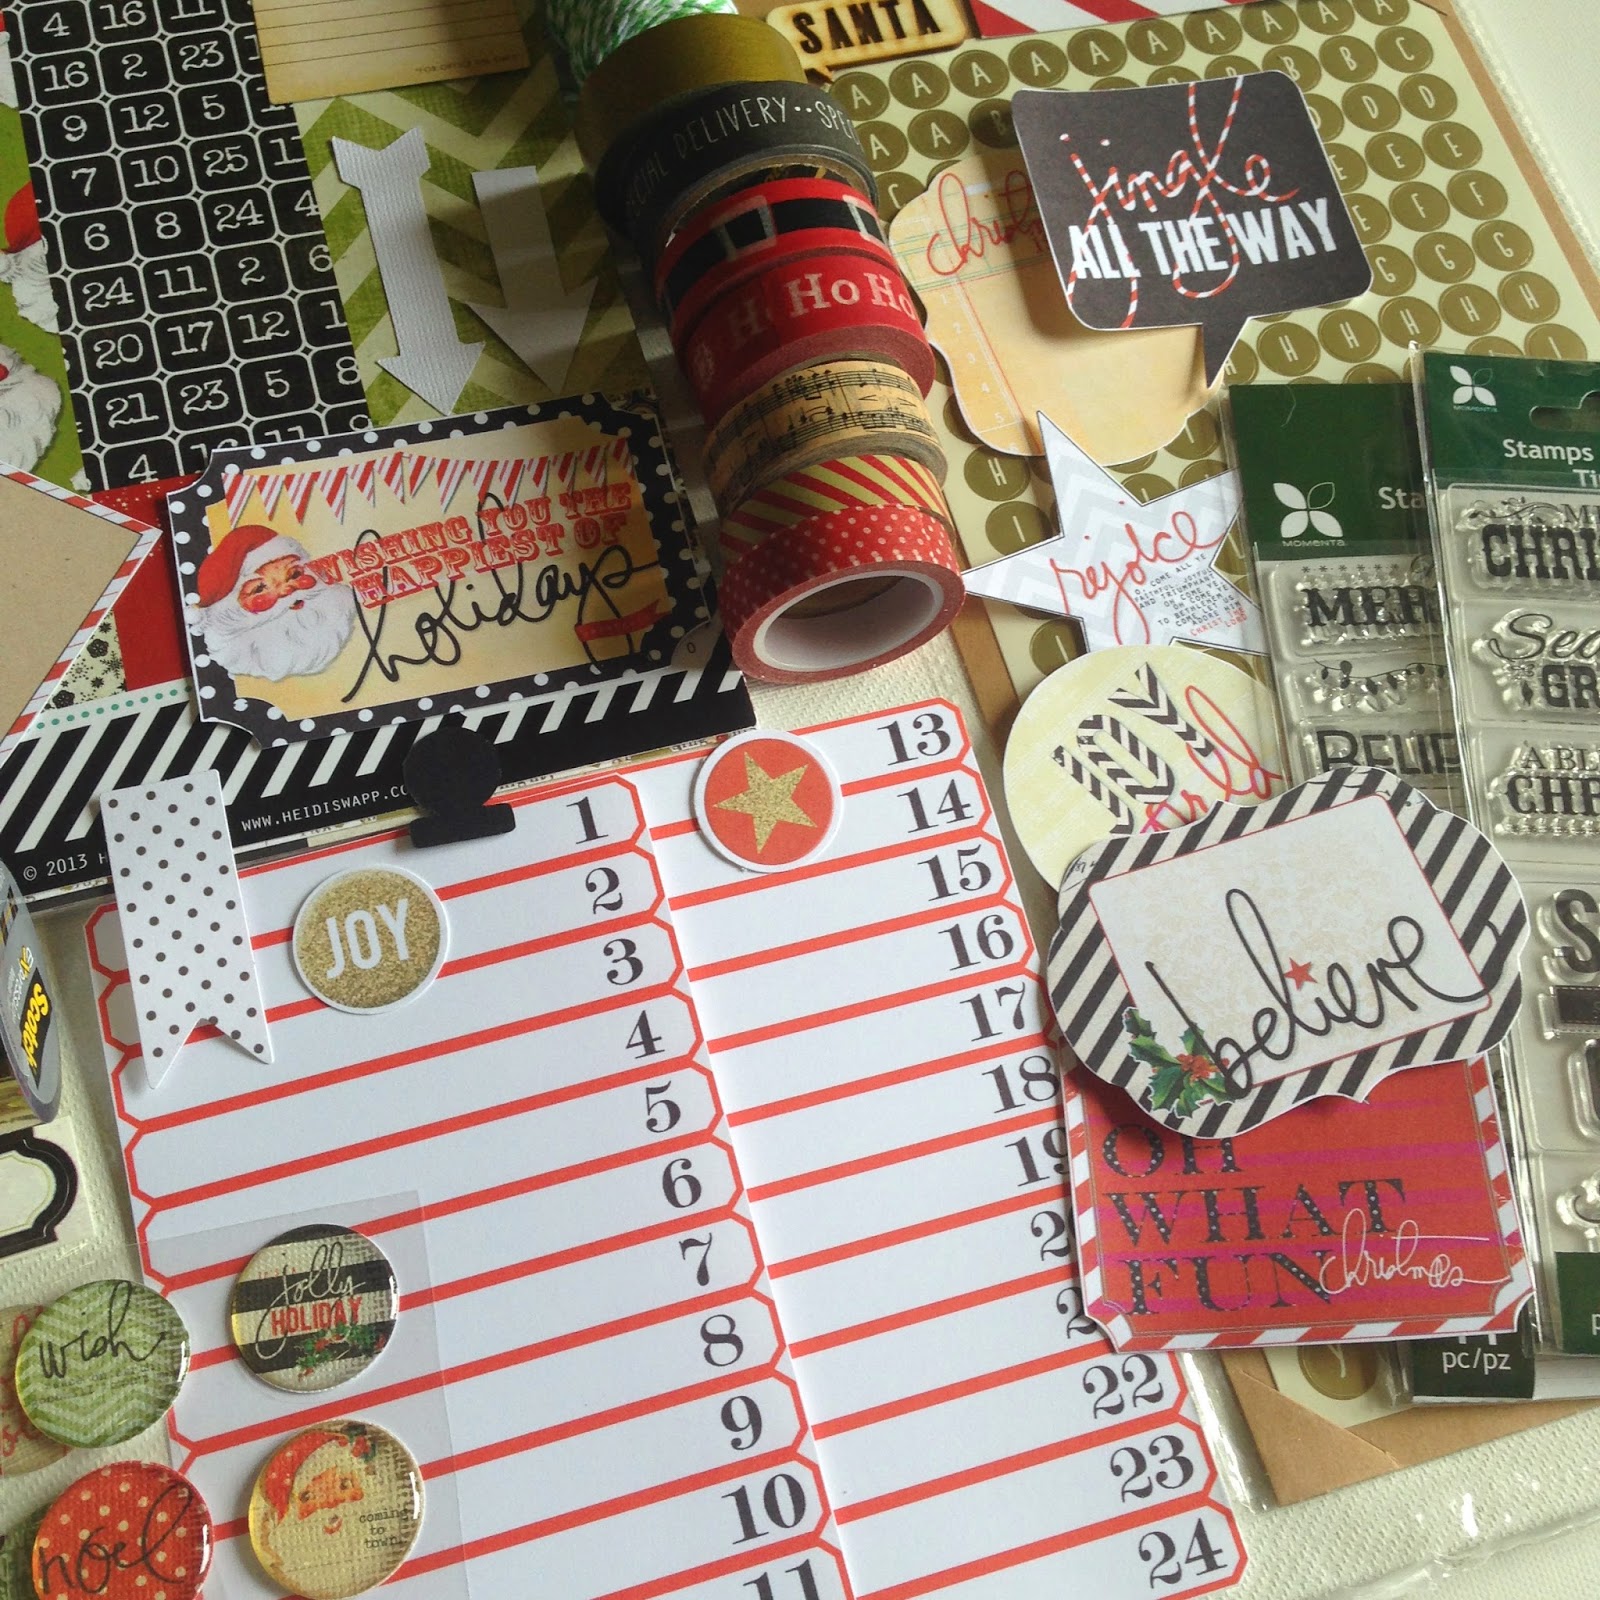
My December Daily is enclosed a box from a Christmas package that I had. I love the idea of using a box to preserve the album after Christmas is over. To embellish it I made a bow and believe sign with my Silhouette.

For the cover I kept it simple as this collection is so amazing that no heavy embellishments are needed. A simple flag, a glitter star,fibers and wood veneers were enough.

For the construction of the album I used a cereal box and the two-ring binding system from Tim Holtz. The size of the project is 6x8, and that was the measurement of my box.

The album consist of three sections: a side flap that is for Christmas preparations, the center part has the daily numbered pages and a special file folder at the end just for December 25th. My youngest daughter's birthday is actually on Christmas day so I really need extra space for more pictures for that day.


The album is full of inserts, flaps and pockets to make it super interactive. The paper pad has so many images that you can cut and use to embellish.


On the Heidi Swapp blog there is tons of free printables that are amazing to use as decor for the pages.

I feel so excited to start printing my pictures that will preserve all the memories of this Christmas Season.


Thank you for reading and Merry Christmas!
Tuesday, December 2, 2014
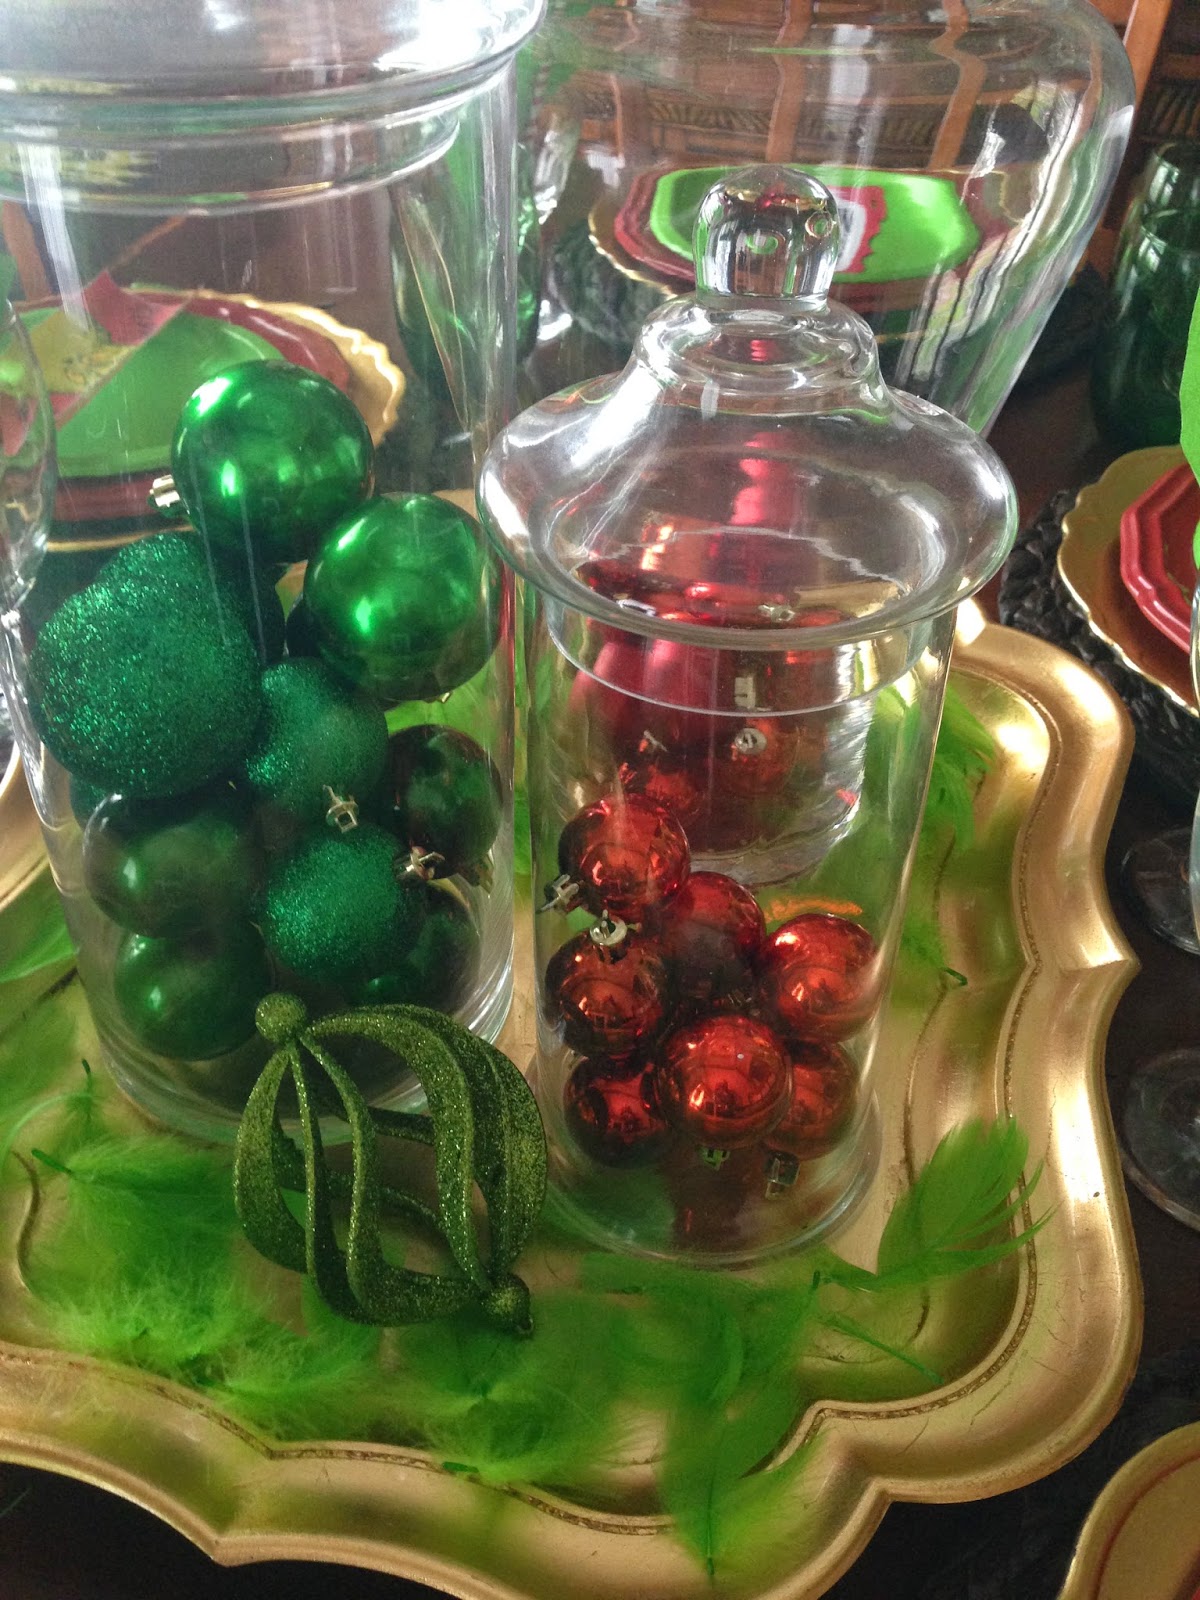
It is Grinchmas in our house this year!
Continuing with our tradition of themed Christmas decorations in our home, this year we decided to have a Grinch-inspired Christmas.
I love the Grinch's story. It has so much meaning, that it was an easy pick for us.

I want to share this quote from
Dr. Seuss: "Perhaps Christmas doesn't come from the store, perhaps Christmas means a little bit more". That was the inspiration for our
theme this year.

This year was a little bit
difficult to decorate, being that the Grinch is not readily available in stores right now.
We had to use a lot of our imagination to put the theme together.

But at the end the theme got together well and I especially like how colorful and cheery our house looks this holiday season.
Printables were our best friends. You can find so many things online especially on Instagram to get your theme going.

I was so inspired by the theme that I forgot to take pictures of the process of making some of the homemade decorations. But these frames from Michaels are my favorites. They were unfinished wood that we painted lime green and used a printable to complete.


We made ornaments using the Silhouette and Dollar Tree foam ornaments.

They bring so much color to our tree.

Here are some other pictures of the tree and the DIY ornaments.


For finishing touches I found some Grinchmas fabric that I used to make pillow covers for the living room and even framed some of it for the foyer table.


And i made this sign with the silhouette for the entrance of the house. It is my welcome to our guests to show them what's ahead.

Thank you for reading and Merry Christmas!
Saturday, November 8, 2014
New Filofax Saffiano Set up

This time I picked a Filofax Saffiano in Poppy red. As you can see in the picture it matches my Kate Spade iPad cover perfectly (gasp!)

I love the A5 size but it was getting a little too heavy to carry around so I downgraded from an A5 to a personal size for portability for the first time.

As soon as my planner got home I started the homework of creating a new kit of dividers, embellishments, post-its and other goodies.

Target Dollar Spot is my favorite place to get all of my supplies.

But my major inspiration was the paper collection Modern Romance from Webster Pages and the Heidi Swapp Project Life kit that I used for embellisments.


I made my own dividers with the help of my daughter (Thank you Mija!) because the ones that come with the planner are a little too formal for me.


Here are some of my dividers and inserts:

These ones are a printables I made in my computer.


In this one I used a greeting card cut to size with a quote I love.

I used Project life cards as decorations:

This is my dashboard that has an amazing gold title from Heidi Swap.

I plan to use my new planner starting December 1st because of the red color that remind me of the holiday season. I'm gonna call it my early Christmas present.
Thank you for reading and please leave your comments below.
I love the A5 size but it was getting a little too heavy to carry around so I downgraded from an A5 to a personal size for portability for the first time.
As soon as my planner got home I started the homework of creating a new kit of dividers, embellishments, post-its and other goodies.
Target Dollar Spot is my favorite place to get all of my supplies.
I made my own dividers with the help of my daughter (Thank you Mija!) because the ones that come with the planner are a little too formal for me.
Here are some of my dividers and inserts:
These ones are a printables I made in my computer.
In this one I used a greeting card cut to size with a quote I love.
I used Project life cards as decorations:
This is my dashboard that has an amazing gold title from Heidi Swap.
I plan to use my new planner starting December 1st because of the red color that remind me of the holiday season. I'm gonna call it my early Christmas present.
Thank you for reading and please leave your comments below.
Monday, November 3, 2014
Filofax decorated pages from October
As promised here are the designed pages in my planer for the month of October. Mostly the designs are Halloween themed but you can see how much fun I had playing with the different goodies I had in my stash.
Design for the first week using gold tones to start the transition to fall pages. For this page I used post it notes from Studio 112 (Joann's Stores) Me and my big ideas clear stickers and gold Washi tapes from my stash (mostly purchased on eBay).

Design for the second week is more simple just using the amazing 3x4 project life card from Me and my big ideas. Washi tape from Michael's stores.


For the third design I used another 3x4 card this time from We r Memories Keepers. Stamp set and Washi tape from Studio 112.
And finally last week of October design with another 3x4 by We r Memories and washi tape from Studio 112. The cat is a chipboard sticker from the Masquerade Party collection from Teresa Collins.
Thank you for reading I will be back next month with another set of pages.
Subscribe to:
Posts (Atom)