Friday, June 28, 2013

DIY Hello Kitty planner

I want to share a few pictures of a planner that I recently made for my daughter.  She has always been a big hello kitty fan and asked me to make her a small planner to fit in her purse. 


I used my Bind it all and scrapbook paper from the Hello Kitty collection stack to create the planner from scratch. I also found this awesome Washi tape to decorate the pages.

                           
  The calendars were made on my computer and were simply decorated with some stickers and Washi tape.


A variety of journaling cards were used, just using a Hello Kitty sticker made them follow the theme.


This is an adorable set of Hello Kitty post its.


With left over images from the packaging I made page dividers just attaching a pretty paper clip.


I also attached a pen loop made with an elastic band to hold the most adorable Hello kitty pen.


As a bonus I purchased an assortment of Hello Kitty Stationery items most of them in the dollar section of Target and Michael's stores.


I even had leftover paper to make her covers for her phone.
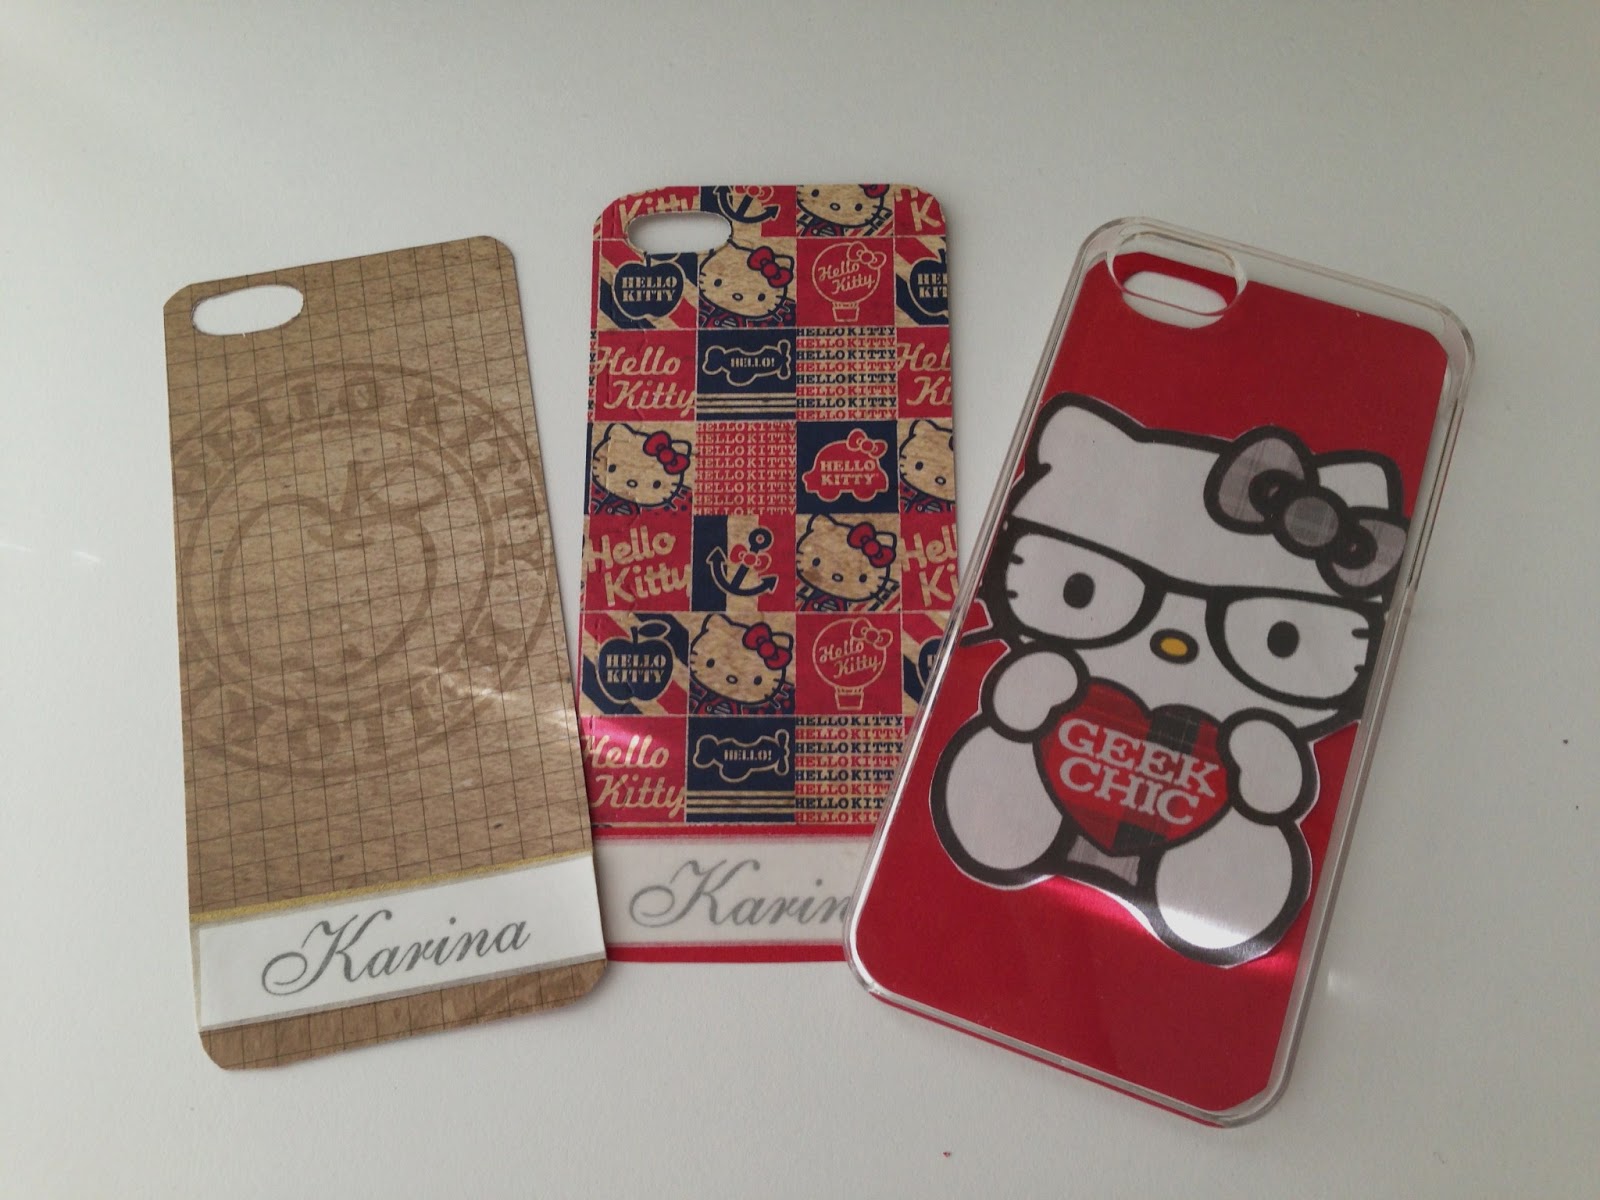

At the end my client (my daughter) was very satisfied with the finished product.


Thanks for reading and your kind comments.

Monday, June 17, 2013

Filofax supplies storage box

I was looking for a new way to store all my Filofax supplies and I found this box on clearance at TJ Maxx. 
It  reminded me of the old times when people used pretty stationery to write letters.


 I fell in love with the clear drop handle that you use to open the box.


The box was actually a jewelry box, but it was perfect for what I had in mind. 


It has two sections: the top part with dividers and a big drawer at the bottom.


It had some damage that I fixed using acrylic paint in ivory color, scrapbook paper and stamps.
This is the finished product.


All my goodies now have a home.


Thanks for reading and your comments!


Thursday, June 6, 2013

New planner/Journal/Filofax

I got bitten by the Filofax craziness going on right now and decided to use this method for my planner this year.


  Filofaxes are amazing but on the expensive side so I purchased a similar version called Day Planner, that of course I personalized to my taste. I decided on this type of planner for the versatility of being able to change your pages and to add fun accessories.


The planner brings your basic filler pages like calendar, reference, contacts and blank pages. I decided to add my own tabbed sections with my personal interests.


Using scrapbook paper I created this feminine but still fun theme throughout the planner. I also used inspirational quotes printed on vellum paper.


I tried to color coordinate all my other accessories using paper and Washi tape as decor.


Available online are a great variety of printables that you can use as add-on for your planner. Another solution is to create your own templates using your computer, like this bill planner.


On the back of my planner I created a post it storage solution using acetate. As you can see Post-its are my newest obsession.


I used color lined paper to beautify my planner. I also added a variety of fun items like pockets, paper pads and pictures.


I'm planning on using a color coding system to keep me organized. Pens in different colors and stickers will help me achieve this.


 It is all about making something that you would love and use through the whole year. Something to keep you inspired or that will make you daydream.


A more detailed video is available in my YouTube channel.


Thanks for reading and your comments. 

Thursday, May 23, 2013

New Washi Tape organization


One of my latest obsessions is Washi tape. The texture, the colors and design of each one speaks to my crafty heart. 


At the beginning I was storing my Washis (that's how I so lovely call them) into a small box, which of course I outgrew with some of my latest hauls.


Washis in hand, I visited The Container Store and I believe tried every container looking for a nice solution. Until I found these ones, called Box Box priced at $4.99. Little pricey but exactly what I was looking for.


I thought of storing my Washis flat, but when I got home found that the boxes stacked nicely one on top of the other. 


You can store about 3 or 4 Washi tapes, depending on their sizes in each of the compartments. These two boxes will easily store about 50 of your tapes. You can see here I still have plenty of room to grow.


You can store your tapes by collections (which usually come in three sets), color coordinate them or whatever method pleases you.


I was very pleased when I placed my container on top of my desk organizer. Now I can see all my Washis and feel inspired by them.


Thank you for reading and your comments.

Tuesday, May 21, 2013

Small thank you giveaway ***closed****

This week I'm hosting a small giveaway on my Youtube channel and I do want to include my blog followers. 

This is the link to the video :


Good luck!

Wednesday, May 8, 2013

Make your own Hello Kitty cake

My youngest daughter is a huge fan of Hello Kitty, and I admit it has been my fault. Since the day she was born I have been getting her every item available for her collection.This weekend we were inspired by a TV show (Cake Boss). So we created an easy version of the cake.


We used regular cake mix, frosting, sprinkles and cake coloring.


 We baked the cake in a 9 inch circle pan and two smaller heart pans. But you can easily do the ears by cutting two triangles out of a small square pan. Cover your cake with white frosting, but keep a little separate amount for decoration.


For the final touches we used food coloring to make a yellow circle for the nose and three pink circles for the bow. We then decorated the bow with cake sprinkles. The hardest part was to make black coloring. After a few failed attempts, we used crumbled Oreo cookies for the eyes and whiskers.


 Here is your finished cake:


Thanks for reading and your comments!

Sunday, May 5, 2013

My Scrapbook Expo Experience


This weekend was finally the scrapbook expo in my city. For all of you that have yet to attend one, here's what happens at an expo.

First is the beautiful location. My expo is held in a fancy downtown hotel.


As soon you walk in a few goodies are hand in to all attendees. As you wait in line to enter the vendors pass with coupons and offers.


The expo can be overwhelming in part due to the big amount of people attending. Some of the vendor lines were really long.


The prices differ from vendor to vendor. But some stores, like Scrap That, are more popular because of their great offers.


And even though you want to shop, the most import thing is to see all the new products and ideas that you can bring home with you.


The vendors set up in the front of their stores what is called "make and takes". They're hands-on product demonstrations that you take home, for a small fee sometimes it's even free. The Craft Fantastic booth had a free make and take to teach scrappers to use glass beads for jewelry. Faber Castel also had demonstrations for gelatos.


A whole variety of classes are offered both days of the expo. They were held in separate classes for a variety of different topics. All kinds of scrapbookers attend, from beginners to advanced.


I was volunteering as teacher assistant in two classes. For the classes you get a class kit and get to practice new techniques.


The last day of the expo a raffle is held with different prizes. You receive a golden ticket with admittance that you put into raffle for the prize you want. Some prizes were $100 gift cards to vendors. Other prizes include a Big Shot, a crafting fold away desk and organizer, and baskets full of goodies, even Copics.


These are some of the goodies I was able to buy at the expo:

Sticker collections for $1.00


Stamps sets for $2.00


Paper for 33 cents each.


And this was my splurge item: Washi tape. $2.99, buy 5 get one free.


The most important part to me was getting all the inspiration for new projects and making new friends with fellow scrapbookers from my area. To resume it in one word it would be "incredible". If you have the chance to go, do so. It's so much fun and you learn so much about scrapbooking.

See you next year, scrapbook expo!