Tuesday, October 30, 2012

For My Best Friend's Birthday: Halloween Mini Album

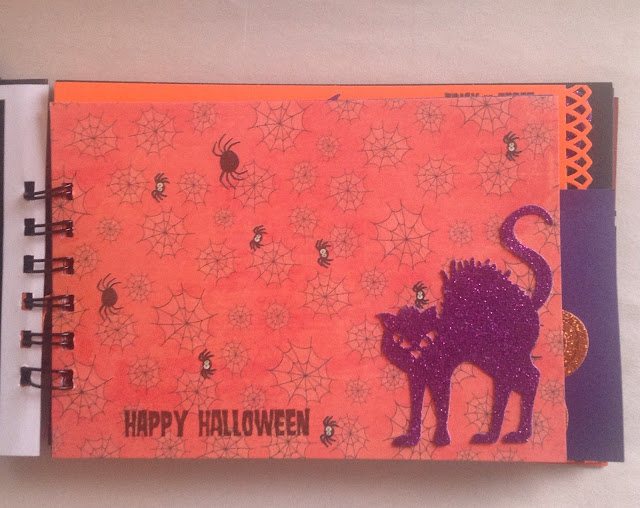
My best friend's birthday is no other than on Halloween. So I decided to give her a scrapbook mini album this year. I filled it with some pictures that we took at work on a previous Halloween. We now live in different cities, and don't spend Halloween together anymore, so I know it would be a good surprise for her.


My friend doesn't do scrapbooking, that's why the album was very simple in construction. I used the K&Company Halloween designer mat pad and embellishments. For the cover I drew a spider-web that was embellished with purple glitter and the sign and scrolls were made with my cricut.


For the inside pages the colors I choose were the classic Halloween colors: orange, black, purple and some bright green. 


I used some Halloween stamps for decoration.


Some of the embellishments I used black glitter to make them pop.


I'm not publishing this post until she gets it in the mail and I hope that she likes it. Thanks for reading and I'm always happy to get your comments.

Monday, October 29, 2012

Halloween craft: Candy wrappers

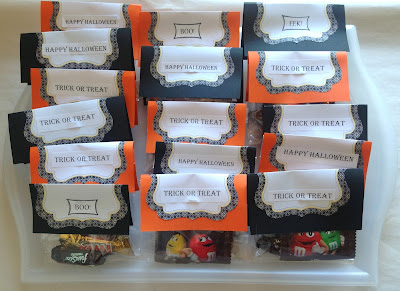
This week is Halloween! Finally! For my last craft of the season, I wanted to do something for my trick or treaters. I did not want to hand plain, old candy, candy wrappers looked bland too. So this was my alternate solution: pretty candy wrappers.


I used clear cello bags to pack the candy and used my Cricut to cut the top design of my bags from scrapbook paper. I printed tags with: "trick or treat", "eek!", "boo!", and "Happy Halloween" from my computer to finish the look.


They were so easy to do that in a minute I made a pretty good stash!


They are now displayed in my foyer awaiting my trick or treaters.


Happy Halloween to all of you, and have lots of fun this holiday!

Thursday, October 25, 2012

Pumpkin Carving

My favorite fall activity is pumpkin carving. This year, my daughters were very excited to create their masterpieces. I, on the other hand, was just very pleased that they wanted to do something crafty, like me.


The hardest part of this is picking your pumpkin. Always try to get one that has a surface area good enough for your intended design. 


First we carved the top off at an angle, to make sure it would stay when put it back on.


And gutted the insides.


We printed stencils we found online and cut the negative shape with an exacto knife. Then we traced the stencils onto the pumpkins with a Sharpee, that way we could see exactly where we wanted to cut.


One of my daughters made a Jack Skellington stencil from this website:


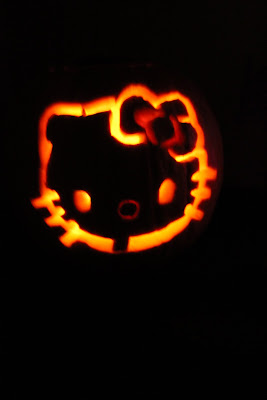
My other daughter is obsessed with Hello Kitty, so she used this stencil.


Here's how the first one came out:


And the second one:


Right now they're on display in my foyer along with a light-up witch that I bought years ago. 


I like to keep it dark there so you can see the contrast.


I still can't decide which one is my favorite.


This project is really easy, and very customizable. There's so many cool, free stencils downloadable from the internet. Really, this project can go as far as you want to take it!

Thanks for reading. And please leave your comments!

Saturday, October 13, 2012

Haunted House Halloween decor

Halloween is one of my favorite times of the year.  I love to decorate the house, look for costumes and prepare candy for those trick-or-treaters that dare to knock on my door.

This year I'm going for the haunted mansion look. It is incredible how much inspiration you can get by searching online and then transforming the ideas into your own.

Here are some of my favorites inspirational pictures:


This sign is adorable:


Love this house entrance idea:


Oh so spooky!


I like to spend as little as possible, so my imagination and thrift or dollar stores are my best friends. Here are some of my own house pictures:


This witch is one of my favorite decor items because it lights up making her more frightful at night.


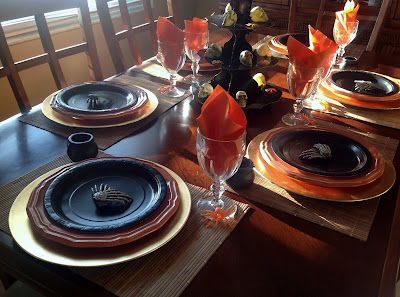
For your table decorations you can use inexpensive items from the dollar store, like napkins and paper plates in matching Halloween colors. Some creepy creatures finish the look.


 Don't forget unusual spaces, like the garage door, it creates a good opportunity to continue your haunted theme.

Use natural elements like Eucalyptus and branches from your backyard,then add some black roses to create a daring floral decor.


Thank you for reading and happy haunting!


Friday, October 12, 2012

Halloween scrapbook mini album

This Halloween season has inspired me to work on a scrapbook mini-album to store all my pictures for this year. Mini Albums are all the rave now in the scrapbooking world because they are quick, and most of all fun to make. I was inspired when creating mine by the haunted house themed decor that my house had at the time that I designed my pages.

For the cover look I used cardstock. I painted it black to create the frame, and used clear acetate to rsemble the look of windows for my haunted mansion. I used spider-web paper as the background. As decoration an old vintage-looking key secured by black ribbon and lace.


 For the inside pages I used a mixed collection of scrapbook paper including: Tim Holtz (idea-ology seasonal collection), K&Company, and Paper House.


Some of the embellishments are from the Martha Stewart Halloween collection (love that line!), K&Company, and Recollections.


 For the titles I used my Cricut basic font cartridge.


 The following page is one of my favorites because I drew the background myself, except for the bird stamp.


I can't wait to get all my Halloween pictures displayed.


Hope this post inspires you all to create your own mini album. Have a wonderful Halloween and most of all have lots of fun!