Wednesday, January 30, 2013

Tutorial: Make your own paper background

In these past few days, I have been looking for alternatives for making journals and scrapbook pages, and trying to achieve a more natural or handmade look for them.

I started to play around with different options.
First I cut the shapes or letters that I would like to use:


After cutting your shapes or letters, remove the negative side:


Then use craft paint to transfer the images to your paper:


And you can still use the positive side of your cuts as usual. This is a double win situation.


In this case I used just one big sign and did the same procedure:


I used a roll of inexpensive brown mailing paper to test this project, but later I applied it to regular cardstock. And these are the final products:


Thanks for reading and your comments!

Tuesday, January 22, 2013

Valentine's day mini album give away**closed**

Happy valentine's day to all!

February is the month of love and friendship. I would love to say thanks to my friends and followers in this blog and also on my YouTube channel. So this month, I'm hosting a giveaway. One of you can win this Valentine's day mini album and other goodies that I included.


To win, it is as easy as this:

US addresses only.

Subscribe to my YouTube channel and post a comment on the video for this project. Tell me what you like the most about this mini album.
(Click here for link to my channel)

I will be choosing a random winner by February 4th, and will send the prize to their home!

Here are some pictures of the mini:


I used metallic red hearts, one with an arrow, and ribbon for decoration:


I used k&company ephemera to decorate the mini and papers from Recollection. This is my favorite page:


Most of the pages have pockets decorated with punches and stamping:


Cupid is the holder for journaling cards:


Punches were used on most of the pages:


Here is a triple pocket page with plenty of room for photos and journaling:


And this is all open for winning! Good luck, and stay tuned for the winner!

Saturday, January 19, 2013

Valentine's day house decor

Happy valentine's day to all!

Recently after a few days down with the flu, I made a trip to Michael's and got inspired by all the Valentine's day decorations and decided to do mine for this year. 

Here are some pictures:


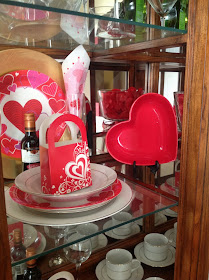
My dining room hutch decor:

Heart plates as decorations:


  Inexpensive paper plates and napkins bring color to my table.


Some rose petals to bring romance:


You can easily create this love sign with wood, pretty paper and letters.  I have a tutorial for one similar I made a few months ago for another holiday.(click here for link)


Red roses to create a pretty centerpiece.


Add some inexpensive red ribbon to your candles to make them festive.


Thanks for reading and Happy Valentine's day ! 

Tuesday, January 15, 2013

DIY Recipe Mini book

Through the years I have been collecting different recipes that have proved to be my family favorites. I had them all stacked in an ugly binder waiting for the time to get a better or prettier way to store them. I couldn't find anything to store them, so I made my own recipe book.  


For the cover I redesigned a regular journal, in a long size because I want it to stand up on the kitchen counter while I'm cooking. I used the "From my Kitchen" cartridge from Cricut to cut the recipe title, the mixer, the kitchen utensils and the chef's hat.  I used mod podge to protect the cover of the book from the wear and tear down the years.


I made nine different tabbed sections with card stock and a white marker: appetizers, side dishes, salads, soups, breads, main dish, BBQ, desserts and drinks.  Each section had a cover page decorated differently. Here they are:

Appetizers:


Side dishes:


Salads:
                                                                             

Soups:


Breads:


Main dishes:


BBQ: 


Desserts:


Drinks:


I also made a few pocketed insides to hold recipes pullout cards.


I also included a page with measurements at the end that would be very handy:


The papers I used were from different collections: Recollections, paper pizazz, and K&Company.  For decorations Recollections stickers. You can easily make your own recipe book too, just be creative!


Thanks for reading and please comment.

Tuesday, January 8, 2013

Welcome to my craft room

I finally have some pictures to show of my craft space. I have been a srapbooker for more than 10 years and a crafter for as long as I can remember. During these years I have collected quite an amount of supplies that did not have a home until now.
       

For many years I used my dining table when working on a project and then had to store my stash away in boxes, which made it quite uncomfortable to sort through. Now it is quite lovely to be able to look at my supplies and actually feel so inspired by it all.


In Ikea I bought a kitchen hutch that I placed on top of two regular shelving units, together they made my favorite place where I store and display most of my supplies. I call it my mini store.


Wire shelves on top are used for storage and decoration.


As you can see by my hutch, I love glitter!


My Paper punches:


For My smaller paper pads I bought two small crates that were kind of ugly. I spray paint them gold and used black ribbon to make them interesting.


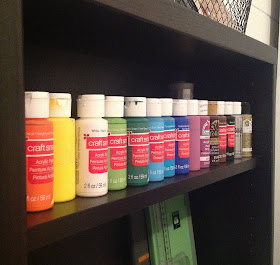
My paints:


I used mod podge and paper to embellish this drawer desk to hold smaller items.


On my desk I have my cutting board, my work desk lamp, my laptop and a rotating tool caddy.
I love this rotating caddy because It holds all of my most used tools and coloring markers.


Also on my desk I have a three drawer desktop organizer that I use to store stamps and ink pads.


For my sticker collection, I used this jewelry holder, with hanging clips that rotates to display stickers.


For my bigger stickers, embellishments and supplies, I used a pegboard for display. I really love this set up because it is easily customizable for all items.


This paper rack is my pride and joy. I found it in Goodwill, for only $5.99. I could not believe my luck, I have seen it online for hundreds of dollars. People did not understood why I was so happy when I carried it out the store. (Only a scrapbooker could understand why!)


On my other wall I have a set of Ikea's shelving.  I love it because is ample enough to hold my bigger 12x12 scrapbook albums. On top of it I have my Cricut and my cartridges.


I use a standing paper organizer for my cardstock.


This is a kitchen organizer, but it works great to store my wood stamps.


These shelves I used to display some of my finished projects:


And some decorative items:


My craft room is still a work in progress. While I work, I will continue to show pictures of my progress in future posts.


Thanks for reading and your comments!